.jpg)

Experienced in electroplating? Here you will find valuable tips!
It all comes down to the right preparation for your coating project!

Polishing the surface
Cleaning and degreasing


Determine electrolyte quantity
Tips for the electroplating process


Helpful steps for post-processing
Frequently asked questions
Aluminium and titanium are suitable for anodising. We recommend our products exclusively for aluminium.
Our products cover the majority of the most common aluminium alloys. However, the industry is constantly evolving. For an overview table of compositions suitable for anodising, please see our anodising guide.
In this case, the concentration of the colour solution is not high enough. We recommend 10g/L. Also possible: the alloy is not or only insufficiently suitable for anodising. You can find an overview table on this in our instructions for anodising.
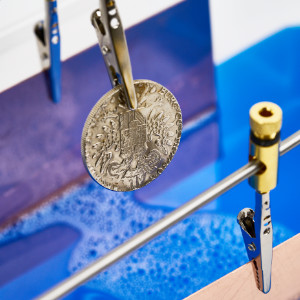
When anodising, the surface area of the workpiece is calculated in dm² and multiplied by 1.5. This gives the necessary amperage for your project. As soon as you set this on your machine, the voltage regulates itself automatically.
No. Only the aluminium piece and titanium wire may be immersed in the solution with the anodising bath. The alligator clips must not come into contact with the bath.
Our bluing agents primarily create a black coloured surface that is not a real coating but inhibits the existing surface of steel, stainless steel or aluminium. Corrosion protection is only achieved if the blackened layer is oiled or painted at the end.
This is most likely because the remnants of the bluing agent have not been rinsed off cleanly enough. This causes components of the bluing to crystallise on the surface and form a reddish-brown layer that looks like rust. Make sure that residues of the bluing liquid are completely removed at the beginning and end and that the surface is clean. Repeat the blackening process and wash off the bluing chemical carefully and completely at the end!
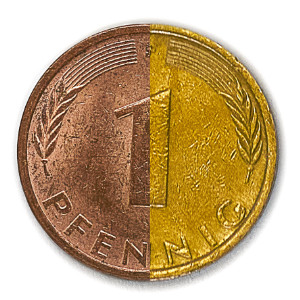
Our product range currently allows us to burnish the following materials: Iron, steel, zinc, aluminium and various non-ferrous metals. Check the product detail page for compatibility with the material you have.
You have to multiply the current density recommended for the respective electrolyte by the surface area of the workpiece in dm² and then get the required current intensity. The voltage will readjust when the current is set accordingly.
This varies from electrolyte to electrolyte. If the anodes are made of the same material as the salt in the electrolyte solution (e.g. copper, nickel, silver, zinc), the salt content remains constant because the anode dissolves slowly but steadily. However, the electrolyte is still contaminated at some point and brighteners (if present) are used up.
Certain electrolytes can be diluted. The gold electrolytes Flash and Midas can be diluted in a ratio of up to 1:1. However, the speed of deposition and the shine then decrease rapidly.
The anodes should be at least as large as the surface of the object to be coated. The supply of 2 anodes (left and right) has been proven to give better results.
If you want to coat from both sides at the same time, you should place an anode in the tank on each side and place the workpiece in the middle. The deposition is then more uniform than with the method with only one anode.
The depletion of the electrolyte can be recognised by the slowing deposition. The colouring of the gold electrolyte Midas, for example, does not indicate that the electrolyte has been used up.
For gold and palladium: stainless steel or graphite. For copper (basic and acidic): Copper. For nickel electrolyte: nickel. For silver electrolyte: silver. For zinc electrolyte: zinc. For chrome electrolyte: not compatible with bath electroplating.
No, unfortunately that is not possible. Our chrome electrolyte only works in conjunction with the brush process (tampon electroplating).
Yes, this is possible with the help of our conductive copper varnish. The object is sprayed or brushed with copper conductive paint or copper conductive lacquer spray, which first creates a metallic layer. The object is then given its final conductivity in a galvanic bath with acidic bright copper electrolyte. This creates a continuous, conductive copper layer that can then be further treated like any other copper layer, e.g. by silver plating.
Rust Piranha can normally be painted over or treated further. However, please check on an inconspicuous spot whether the rust converter is compatible with your paint colour.
Our products for electroless silver plating only deposit on copper and brass as a base, as the products can only deposit silver with these materials. Accordingly, the products for electroless silver plating can NOT be deposited on silver. If copper or brass are coated, a thin silver layer of 200 - 300 nm is produced, which is intended for decorative purposes only. If you want a thicker silver layer on your object, the only process left is electroplating!
No, unfortunately that is not possible with these products.
In principle, it is possible to gold-plate some aluminium alloys with the Gold Star, but so far this only works with a few compositions. The success of the application can therefore not be guaranteed for all aluminium alloys.
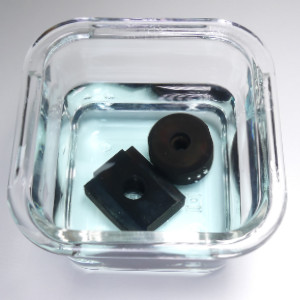
The zinc object must be clean and free of residues such as dirt, oil or particles. The object is then degreased, e.g. with the TIFOO Galvano Degreaser. Depending on the size, the object is immersed in the yellow chromate for a few minutes. 3 minutes is a good guideline.